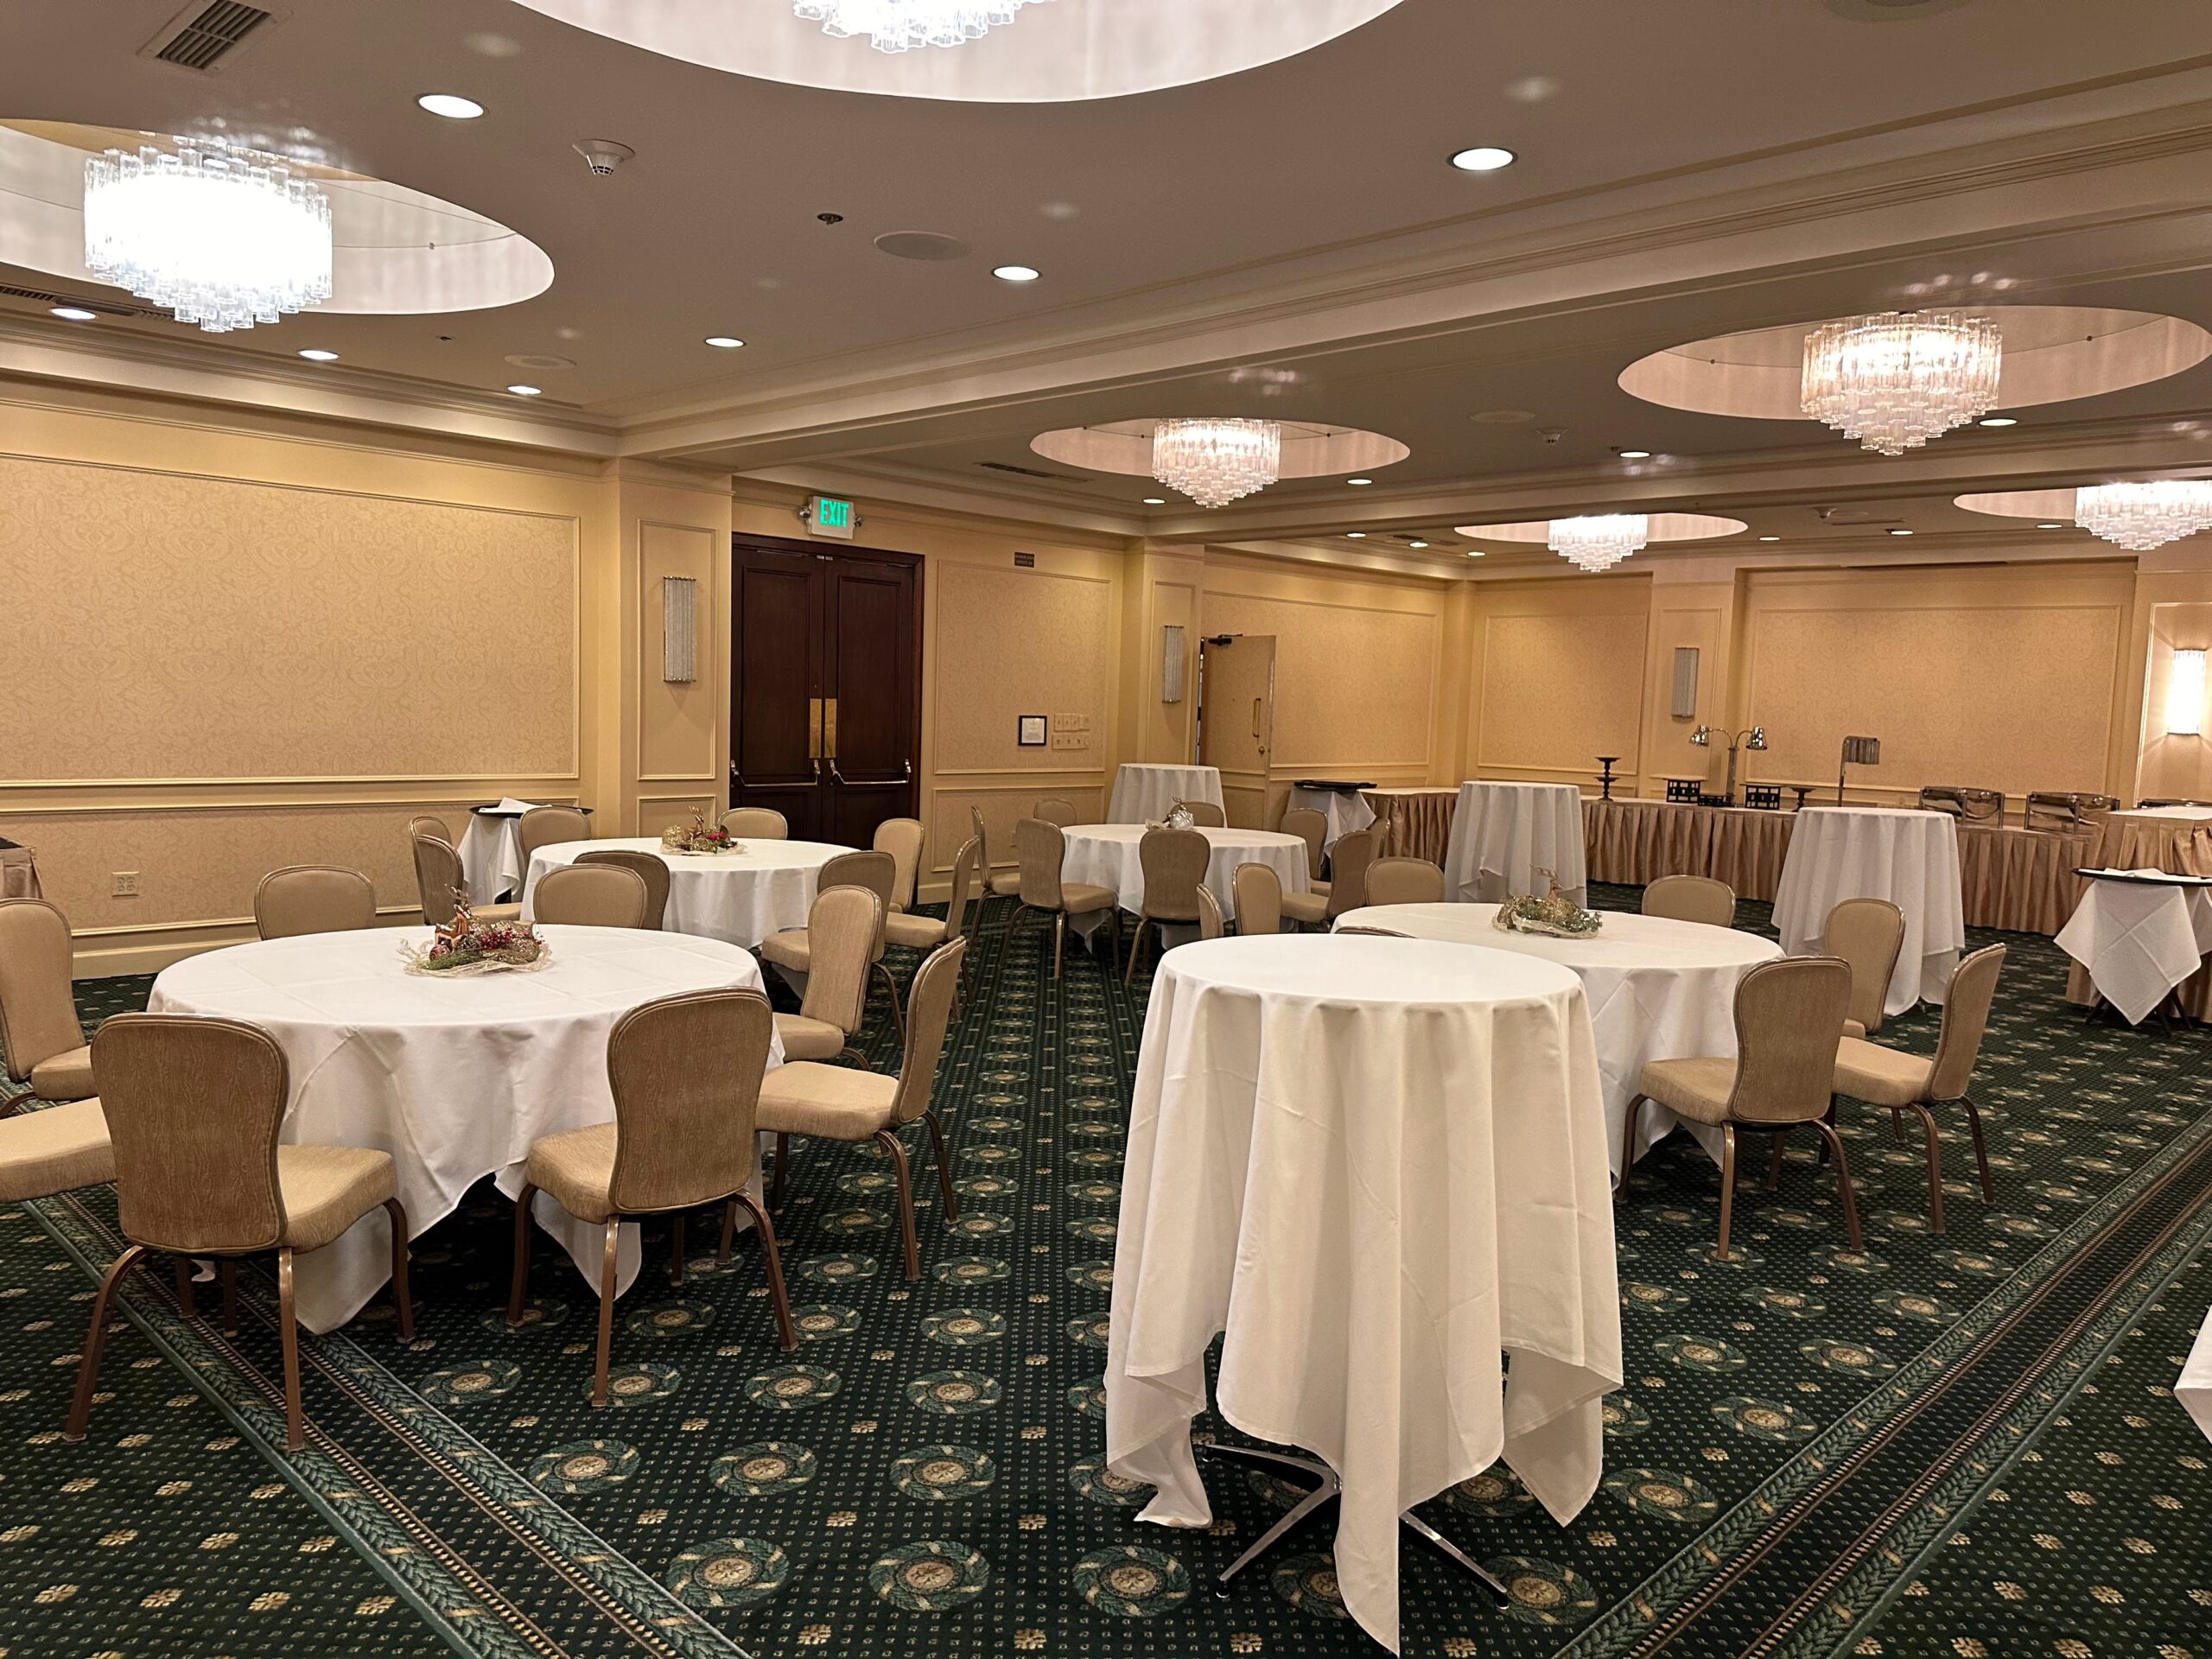
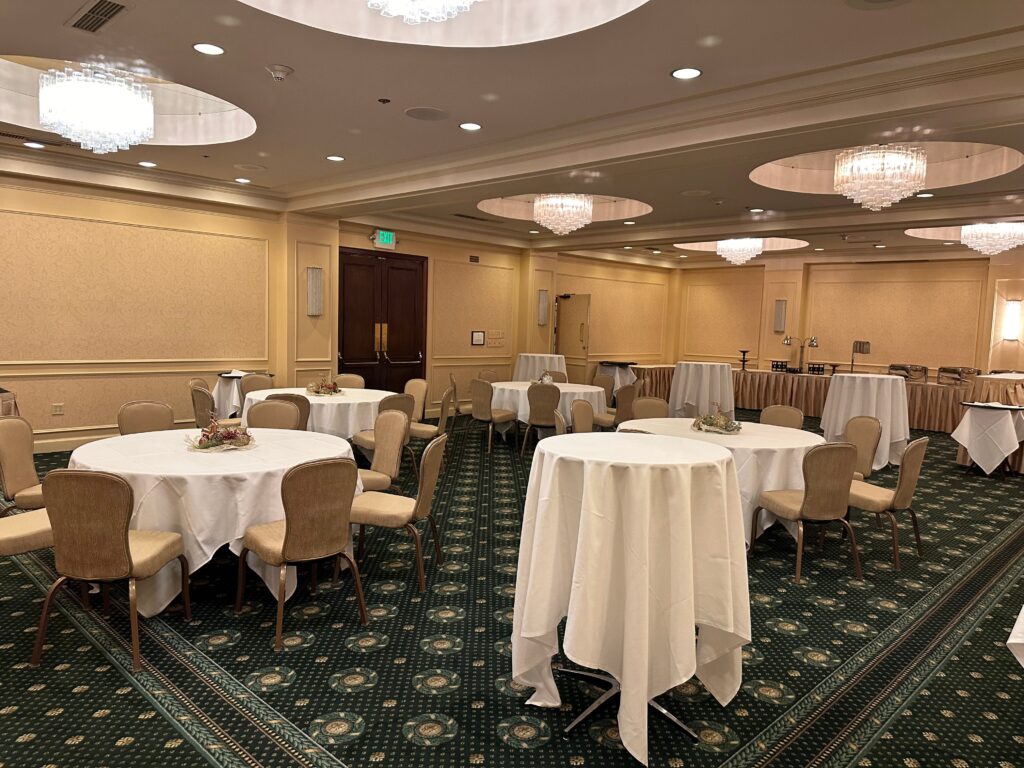
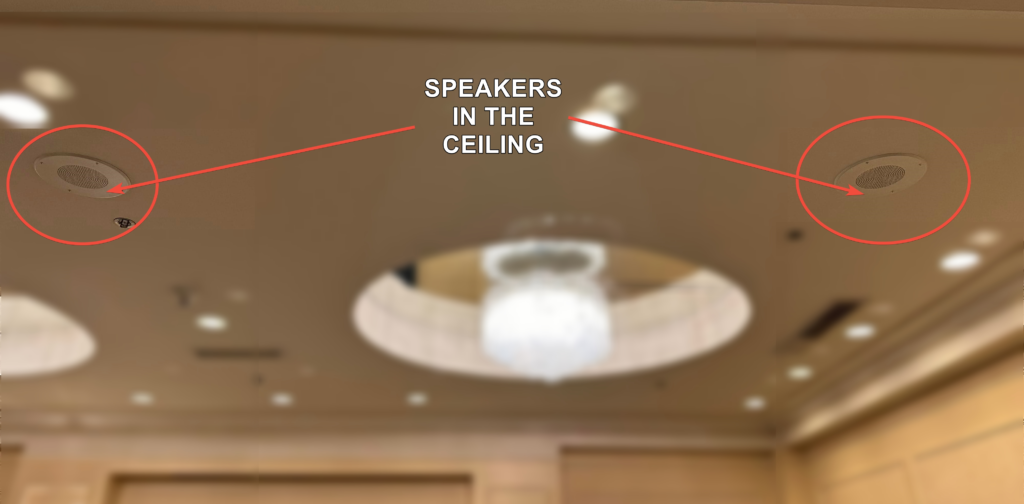
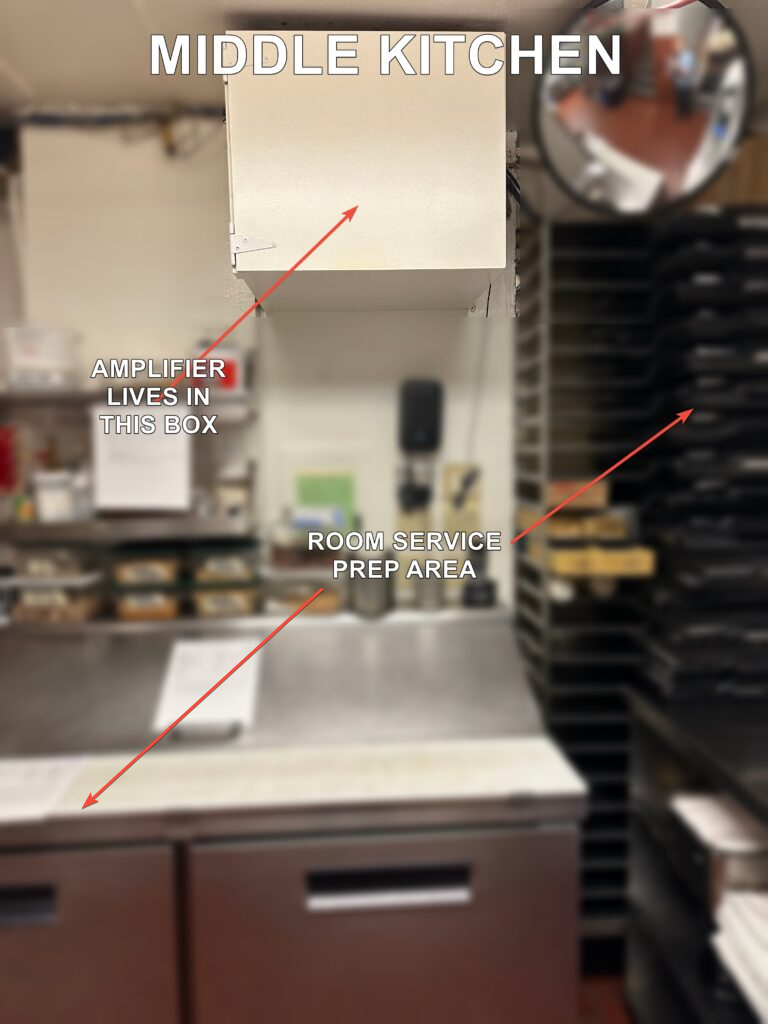
Plymouth room has a stationary sound system built into the walls (microphone connectors) and ceiling (speakers), with an amplifier lives in middle kitchen in a box above a prep station. Briefly, here's what all of those look like:
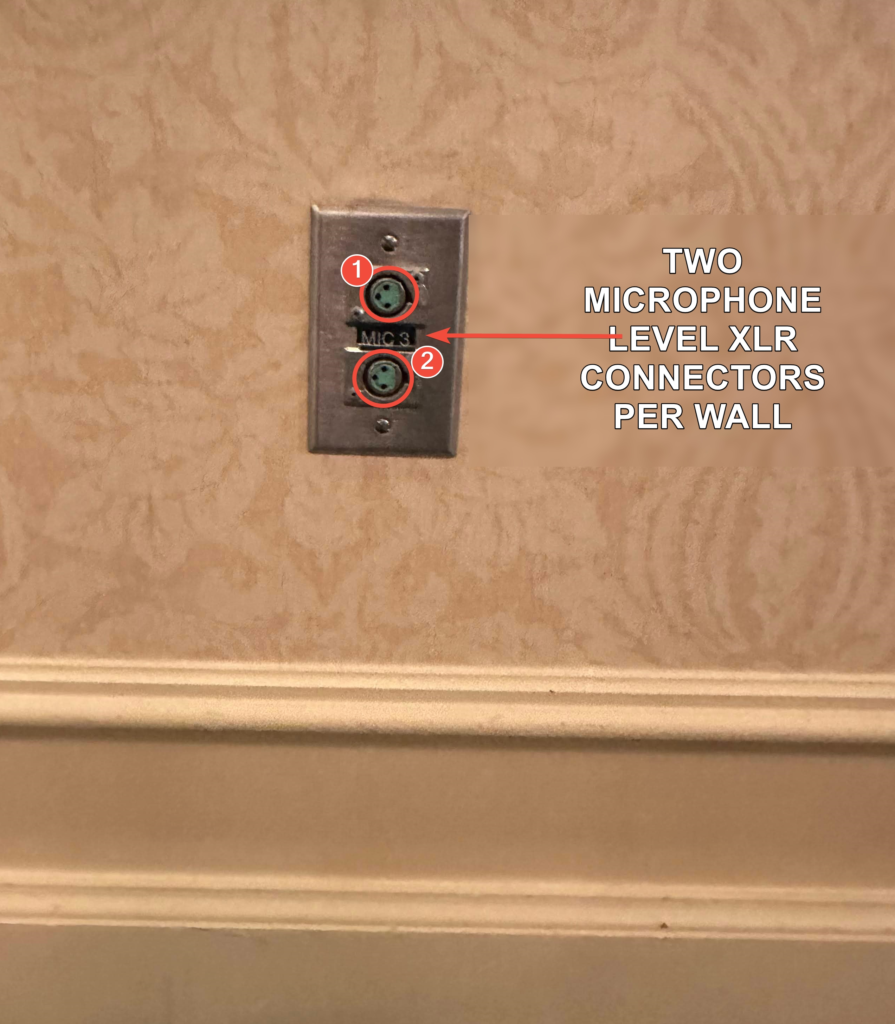
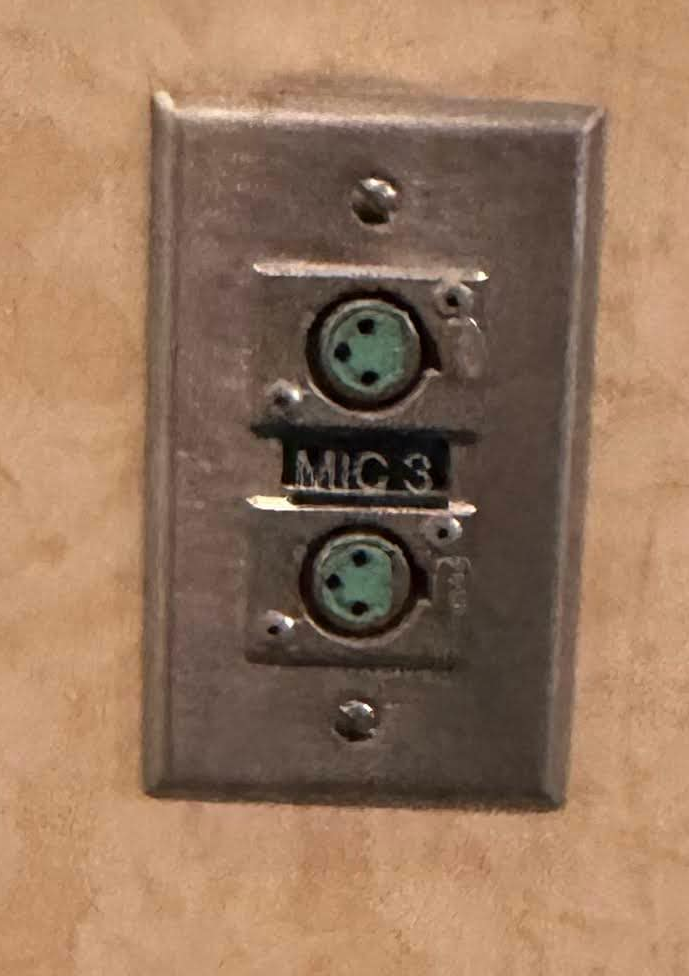
XLR input connectors are built into each of the walls around Plymouth room in single-gang, two-connector faceplates. These are labeled 1 - 4, and correspond with the channel of the same name on the amplifier.
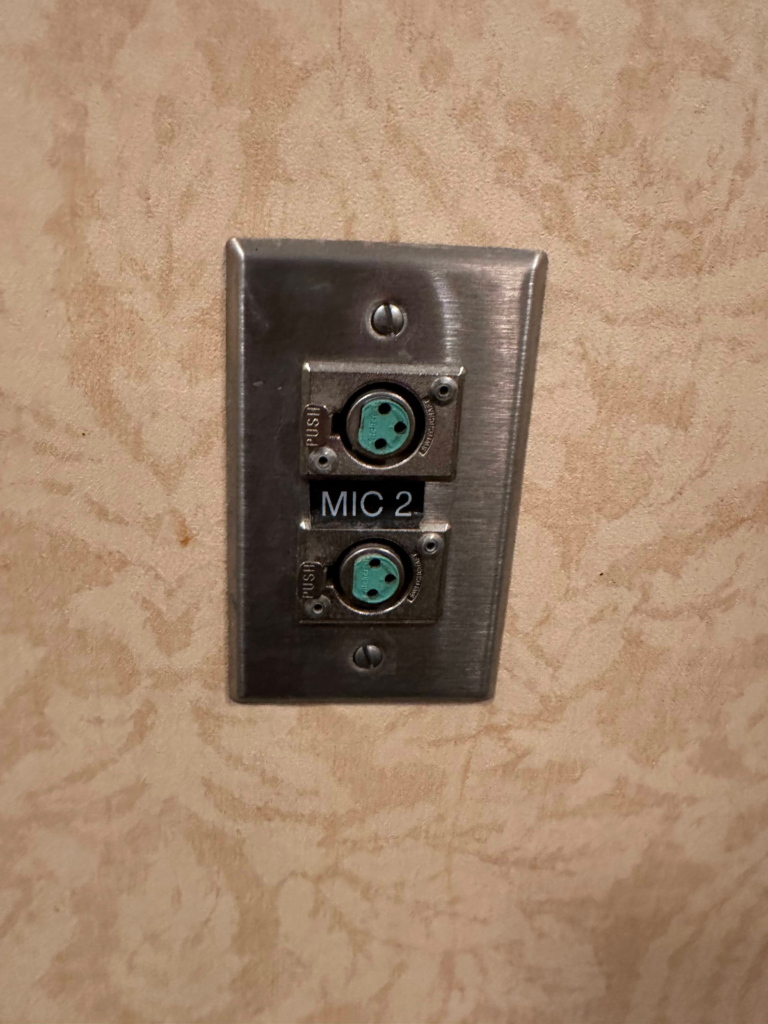
Example: Plate shown here has two connectors that correspond with channel 2:
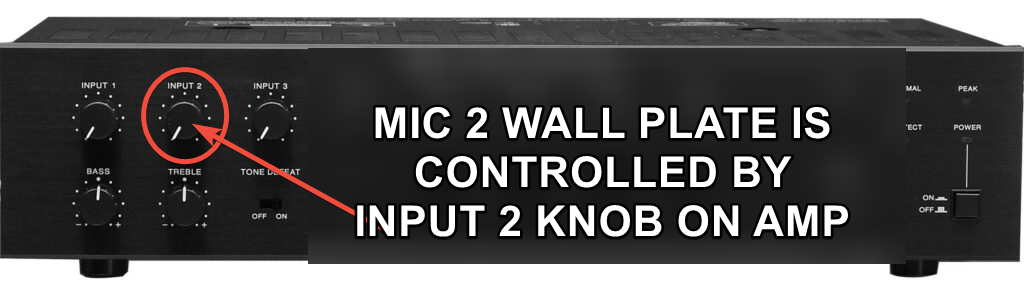
Both connectors in each faceplate go to the same channel (aka knob), and are designed to be microphone inputs only. Line audio (aka music) sources (e.g. iPhone) can be connected to these inputs either by using a DI converter box, or by turning the volume on the source WAY down to avoid distortion and/or feedback.
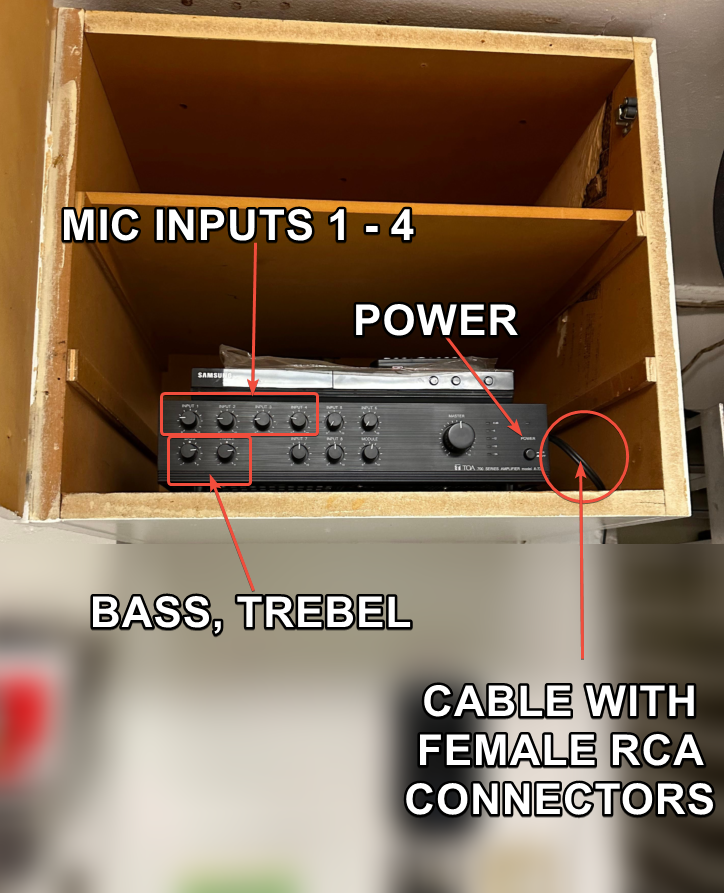
There is also a pair of RCA cables going to the back of the amplifier in the kitchen. If you don't mind (or would rather) the source of music be outside the event room, you can pull the cable out to the right of the amp and plug an RCA cable in there. The RCA connection does not need a DI box for a line audio source. It will not accommodate a microphone. This is probably OK, since most guests would prefer talking on the microphone in the event room than the kitchen, but you never know.
Options:
There are two ways you can use the Plymouth room sound system:
- Sound source plugged into the connectors on the walls
- This could be a microphone, phone, computer, etc. but anything other than a mic requires a DI box
- Sound source plugged into RCA jacks in the kitchen
- This input is not suitable for microphones without increasing their output with a preamplifier or a mixer
Equipment we have curated for using the sound system built into Plymouth room:
Meet the Plymouth Room Mic & Music Box
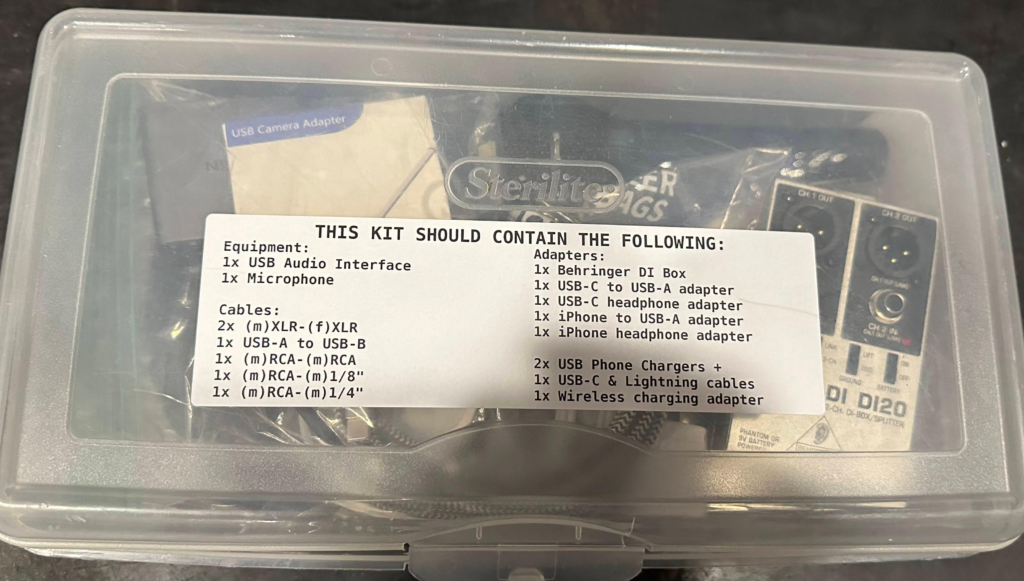
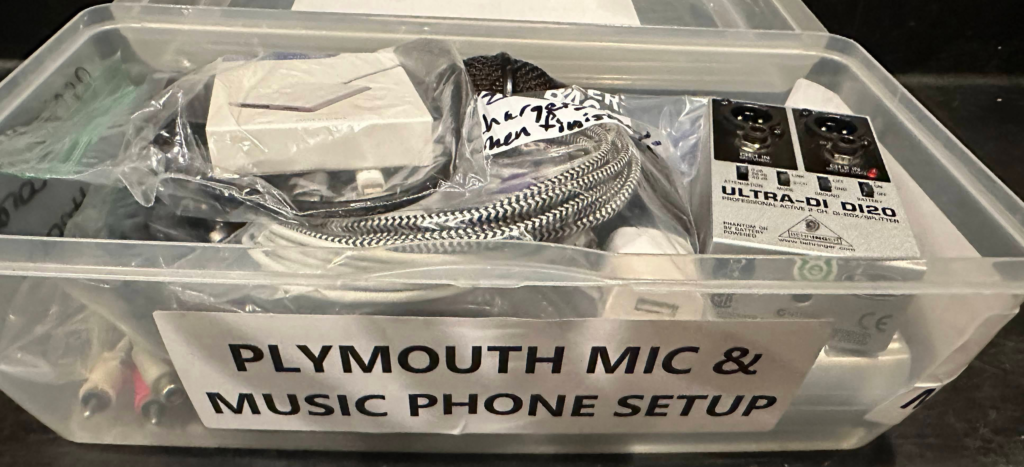
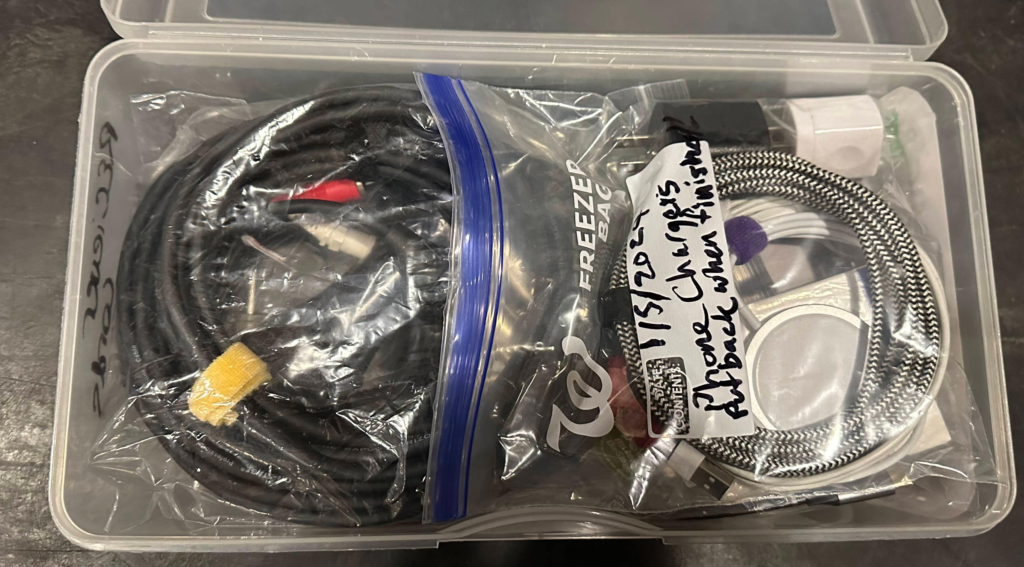
There's a box among the AV equipment in the banquet room labelled Plymouth Room Mic & Music Phone Box. It says phone, but the equipment can be used with any computer-like device. In this box, you'll find the following:
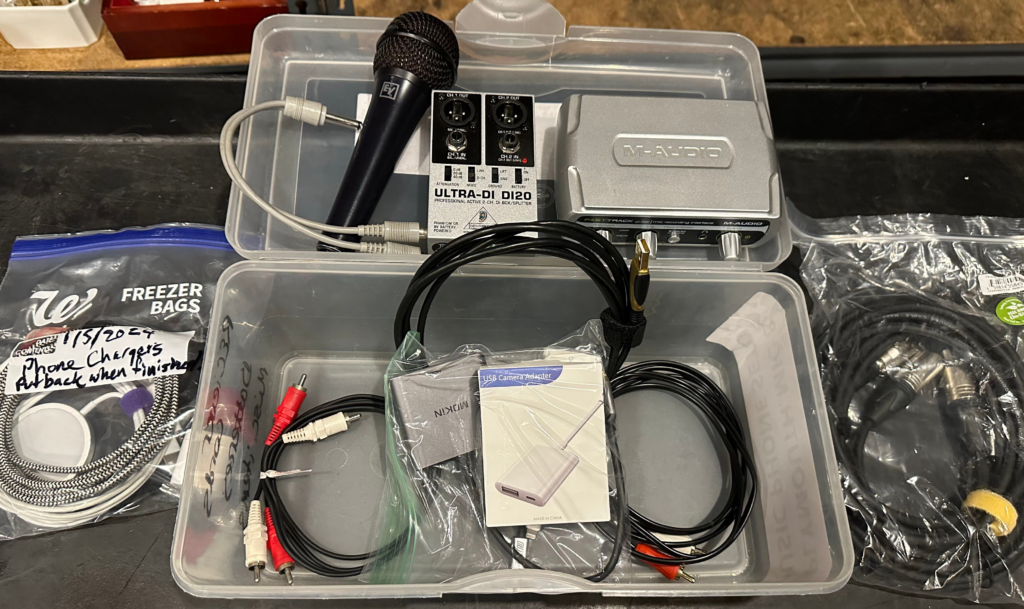
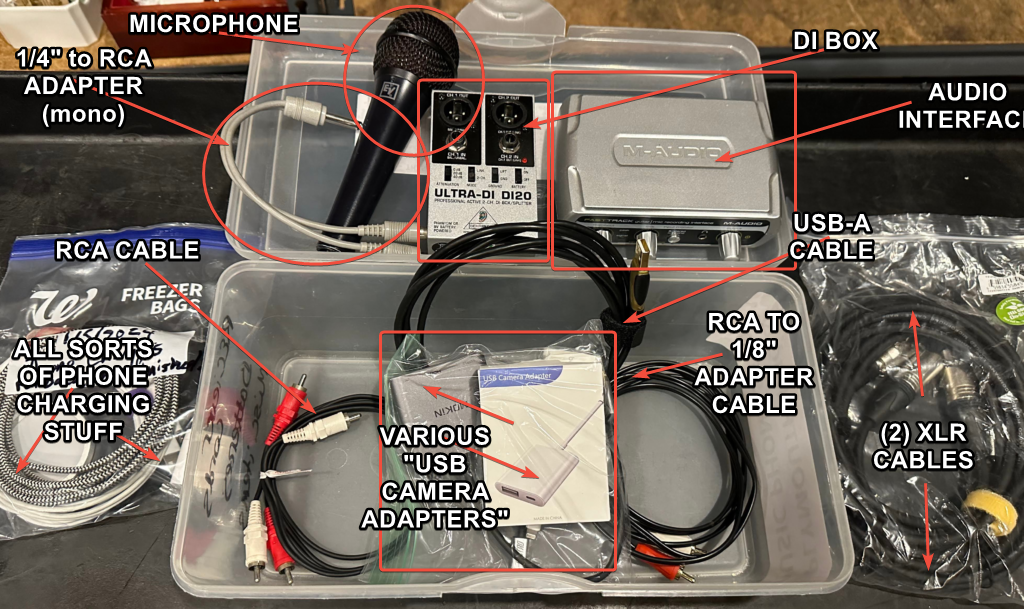
The super important stuff:
- M-Audio Fast Track audio interface
- Mic with an on/off switch (switch does not work)
- Behringer DI120 DI Box
- USB-C to HDMI adapter (to give Android a USB-A connector)
- Lightning to USB "camera adapter" (to give iPhone a USB-A connector)
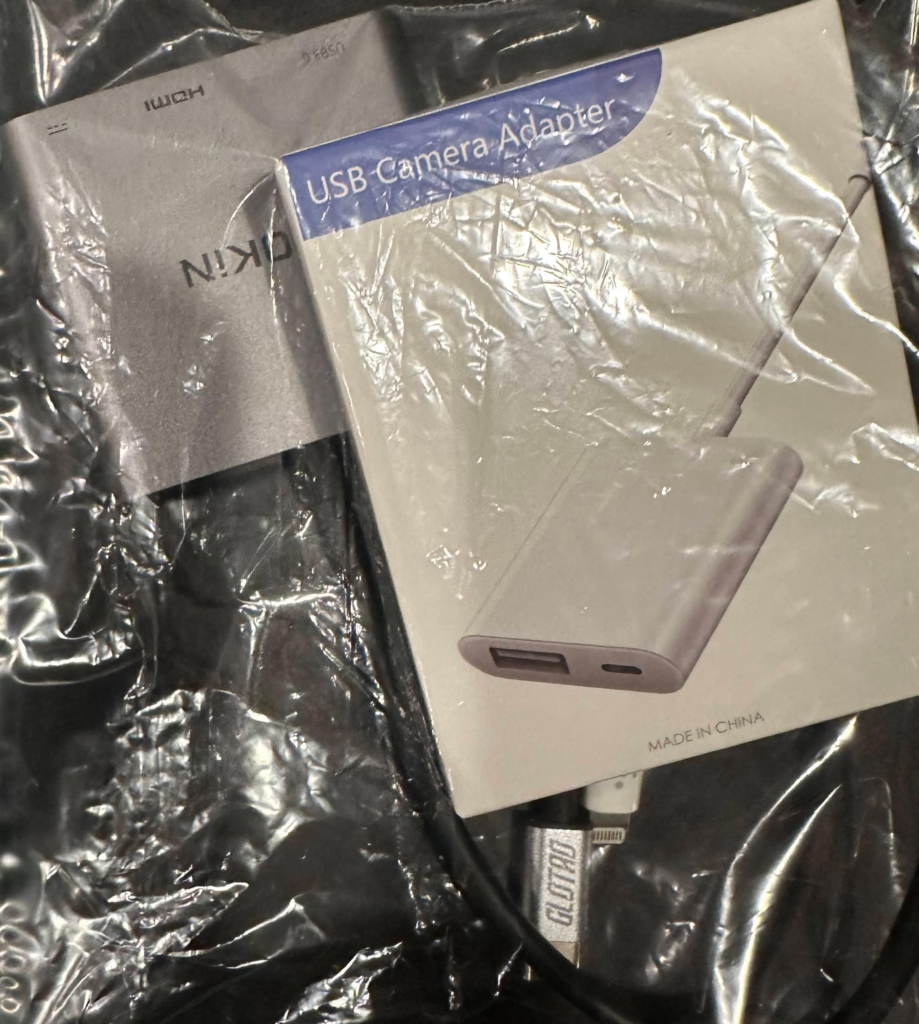
- USB-A Cable for audio interface
- (2) female XLR to male XLR cables - one for the microphone, the other to connect your audio source to a connector on the wall
- Stereo RCA cable
- Stereo 1/8" to RCA cable - for 1/8" "headphone adapter" if using
- Stereo RCA to mono 1/4" adapter cable
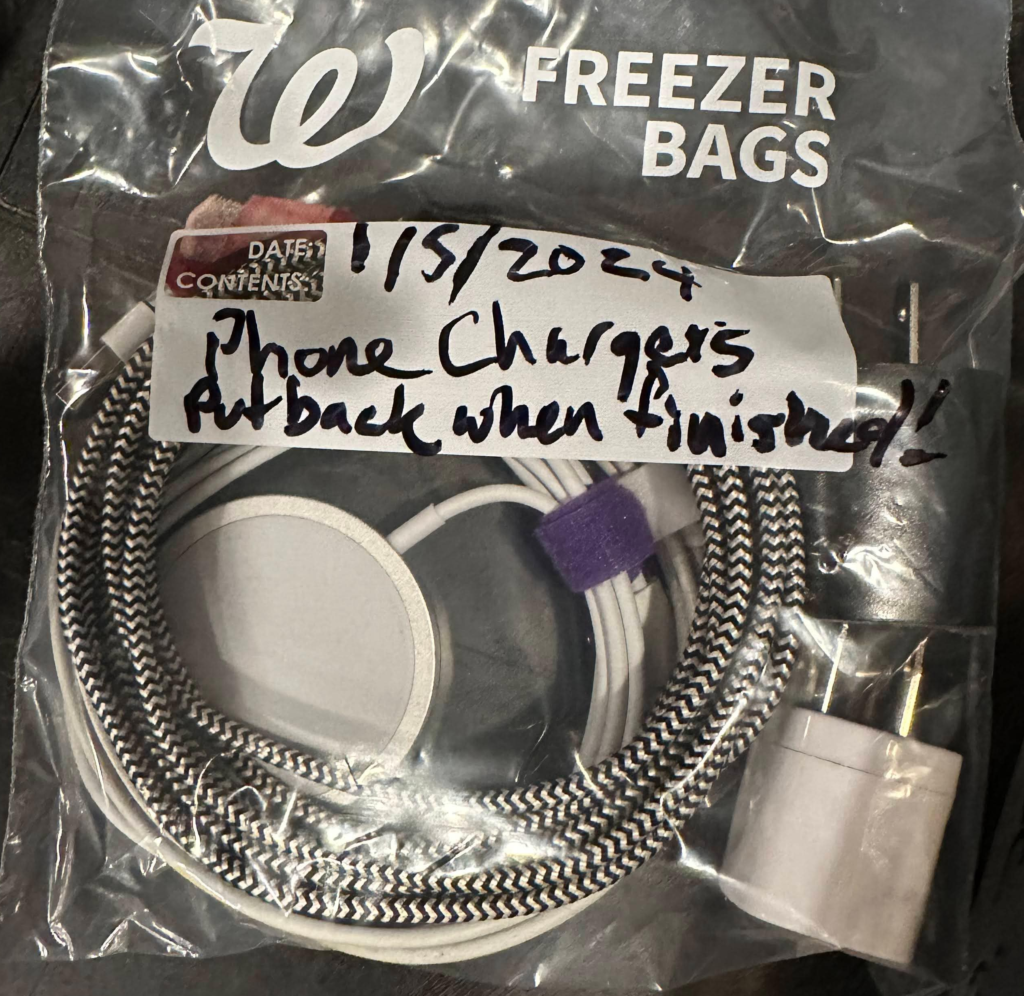
The phone charger bag:
- Magnetic wireless charger cable (cross-platform)
- USB-A to lightning cable (iPhone/old iPad)
- USB-C cable (Android/new iPad)
- AC to USB-A power adapter (aka wall wart)
- USB-C to USB-A adapter (bc wall wart is old)
While you probably won't need all this stuff, it's meant to provide two different configurations, and take two different phone platforms into consideration.
Setup style #1: Phone with a headphone adapter into wall
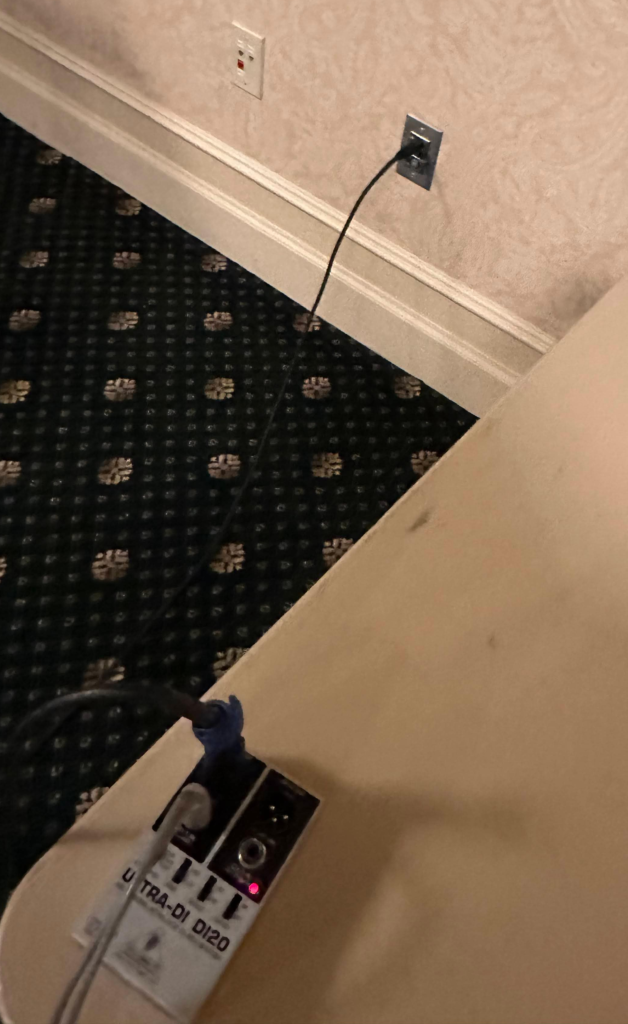
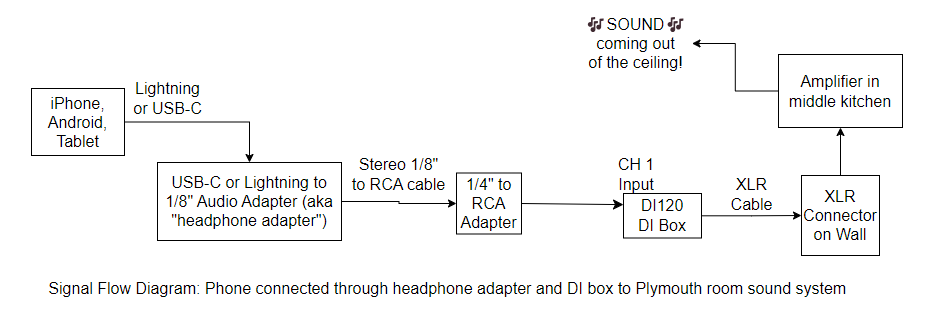
Setup style #1: If you only want music from a source inside the room, use the USB-C (Android) or lightning (iPhone) to stereo 1/8" adapter, then plug the 1/8" to RCA cable and 1/4" adapter into the DI box, and then to a wall connector. This is the most simple setup, and the easiest for you (or guests) to manage.
Setup style #1 w/ a mic, same wall: You can connect a mic to the XLR connector on the same wall, but its output levels will be controlled with the same knob on the amplifier in the kitchen. This isn't ideal, but if you set the volume on the amplifier to your microphone first, and then set the output level on your music source to a level that works with the microphone level, it could be OK.
Keep in mind, none of the mics can be turned off, so you'll have to either put it somewhere very safe, or run to the kitchen to turn down. Could work OK if done by two coordinated people, one in room with mic and the other in the kitchen. Keep in mind, the speakers will pop if you unplug the mic while the channel is up. Please don't scare guests.
Setup style #1 w/ a mic, different wall: If you connect the mic to a different wall, it will have a different knob on the amplifier controlling its output level.
Setup style #1 w/ a mic, line source in kitchen: You can also use the RCA connectors in the kitchen for any line audio sources, in conjunction with any wall connector for a microphone. Still has the issue of level adjustment being available only in the kitchen, but does not require a DI box.
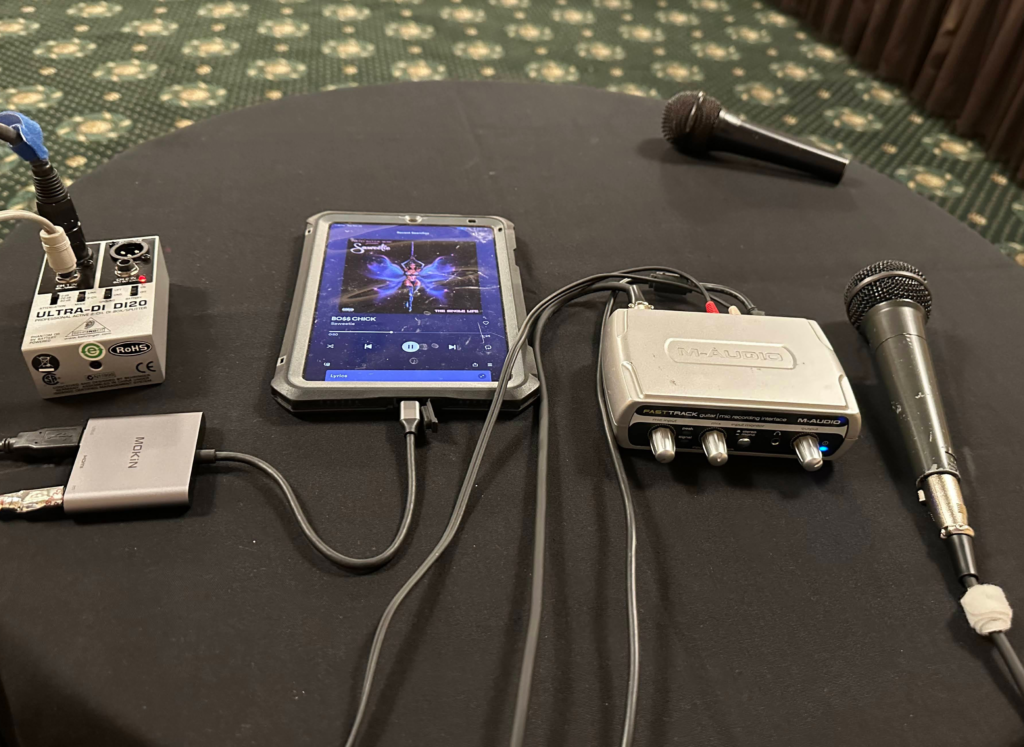
Setup style #2
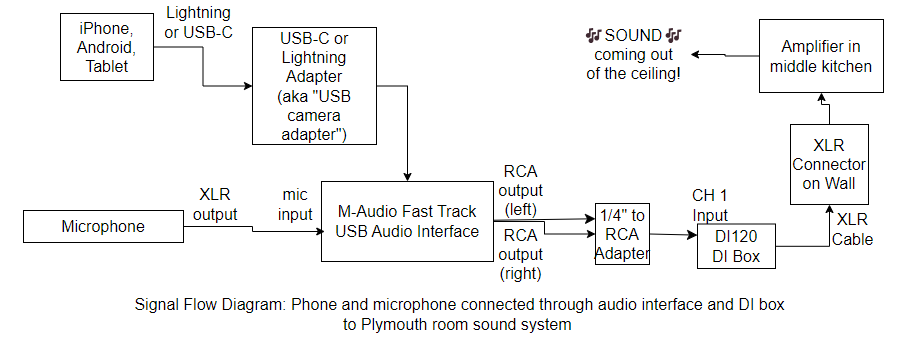
Setup style #2: If controlling the level of your microphone inside the room is necessary, you can connect almost any USB host to the audio interface - shown here with a 2023 iPad Mini. Once you make sure the audio interface is working with your chosen device, connect a microphone to the interface, and control the mic signal with its mic volume knob. From there, you'd plug the interface into the DI box, then into wall connector.
Note: The charger and cables for each scenario are included to ensure your client's phone or tablet doesn't run out of power. If for some reason the USB Camera Adapter style power input doesn't work, you can try the wireless charging adapter.
DI box: An important step for sources of music
The inputs on the walls of the Plymouth room are all microphone-level inputs. That means they are high gain, and very sensitive - too sensitive for the outputs of line-level sources. Therefore, you need to use the DI box in your signal path between your line-level audio source and the inputs on the walls.
Here are the settings I've found work best with the inputs on the Plymouth room amplifier:
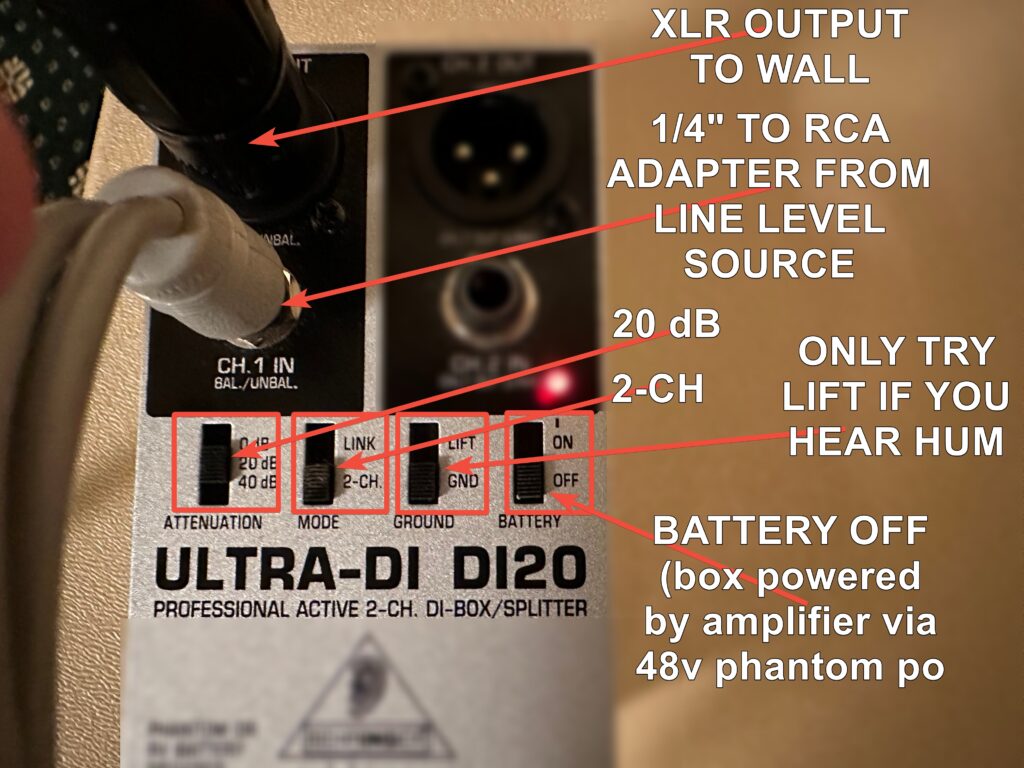
- Set attenuation at 20 dB. This is the main reason you're using the DI box: It drops a -10 dB output to -30dB, making the line audio source match a mic input.
- Set mode to 2-channel. Not particularly relevant to our setup, but it's the most correct.
- Set ground to "GND". This switch should be flipped to LIFT if you hear a humming noise coming from the channel. It's meant to mitigate the hum, which is usually caused by poorly grounded electrical outlets (are you plugged into a power conditioner?)
- Turn the battery off. The DI box is powered by the amplifier using a feature called phantom power, primarily meant for powering condenser microphones. It's similar to PoE in networking, look it up if you're curious how it works
Ready for sound in the Plymouth room?
After you get the configuration you plan to use hooked up, you're ready to turn things on and level set. Here's how I suggest you do that:
- Turn the amplifier in the kitchen on. Turn the input level on the channel to 25%. Turn the master volume to 50%.
- Turn level down on your audio source (e.g. mixer, computer, phone)
- Start making sound with your source (e.g. speaking into mic, playing music on phone) and if you have a level adjustment, turn it up.
- Make level adjustments on your source first, but if they can't make the audio loud enough, turn levels on the amplifier up.
Troubleshooting: If you don't hear a sound coming from your channel:
- Check to make sure all the cables in your signal path are connected properly and securely
- Check the output levels on both your audio source and the amplifier
- Check the master volume on the amplifier (knob furthest right - best at 50%)
- try a different input (if possible, turn the volume down on the amplifier before plugging in a new device, otherwise it'll pop - don't scare guests!)


No comments yet