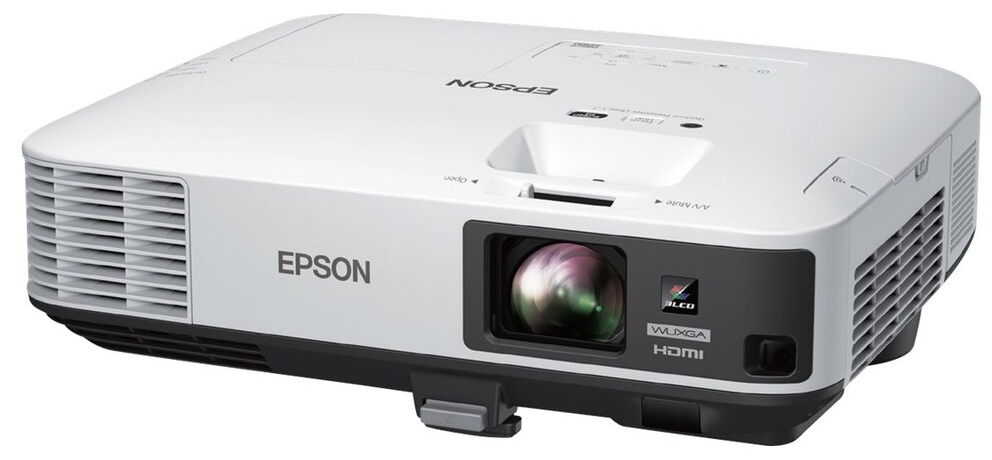
Setting the Projector Up
The main things to keep in mind when choosing where to put the projector:
- Has a straight shot at the screen
- Guests are comfortable and safe (no tripping or blinding hazards)
- Positioned so can be connected to sound system (if applicable)
- Blocking of screen should be infrequent
- Access is easy for making adjustments
Truisms:
- The higher the top of the screen, the higher the projector should be (ideally)
- The further the projector is away from the screen, the larger the picture, but the more difficult to focus
Realities:
Usually an AV cart, bistro table, or a classroom table are all you have available to put the projector on. If the projector needs to go on a shorter stand than ideal, you can use the adjustment in the front under the lens to angle it upward (e.g. if the projector must sit between people in a classroom setting). Conversely, you cannot make the projector angle downward, but it is very unlikely anything you place the projector on will be "too tall" to be under the top edge of the screen.
What placement boils down to:
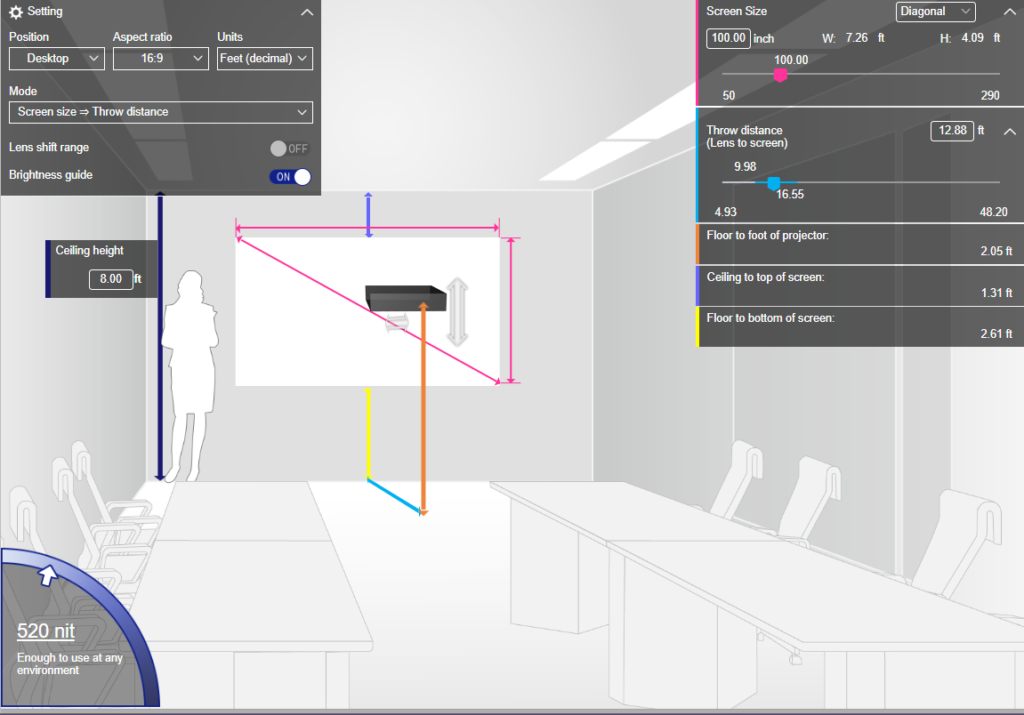
In my experience, the general range for a 100" screen at 16:9 is about 9 ft - 15 ft away from the screen, and sitting between 2 ft - 5 ft high. If you put it on a tall bistro table, that's great for higher screens, but if you can't for some reason, use the lever to adjust the screen to point upward on the front of the projector.
Epson provides a handy calculators that will calculate ideal placement: Projection Throw Distance Simulator - I will provide some numbers through simulation and experience for where to place the projector in specific rooms in the future. If you find a great spot while you're doing AV, please write us a note and let us know!
Don't psych yourself out: As long as you are within a reasonably normal placement, the projector can take care of quite a bit with its built-in features. Don't be afraid to experiment, if it's safe and reasonably out of the way, and you can get to it if necessary, give it a shot and see if it works.
Plugging your HDMI source into the Projector
At first glance, it seems like the rear of the projector has a lot going on - don't be overwhelmed:
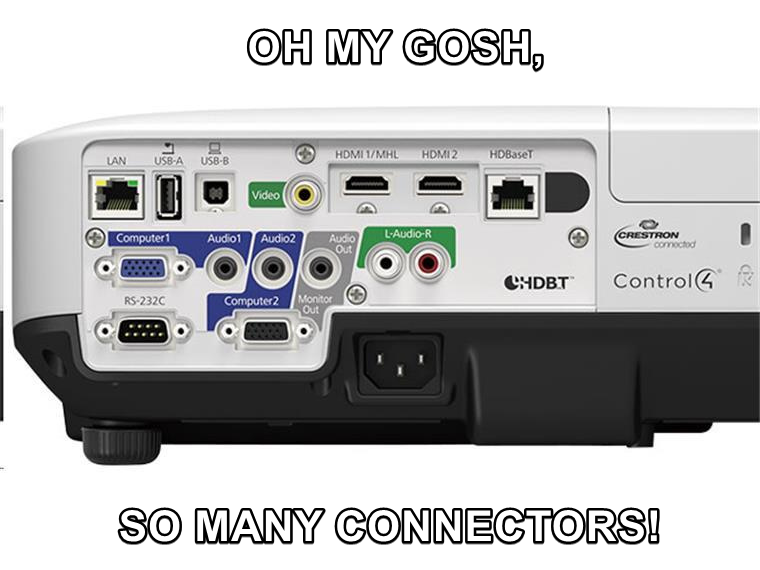
Really all you need to pay attention to are these connectors here: The (2) HDMI Inputs and the AC power connector.
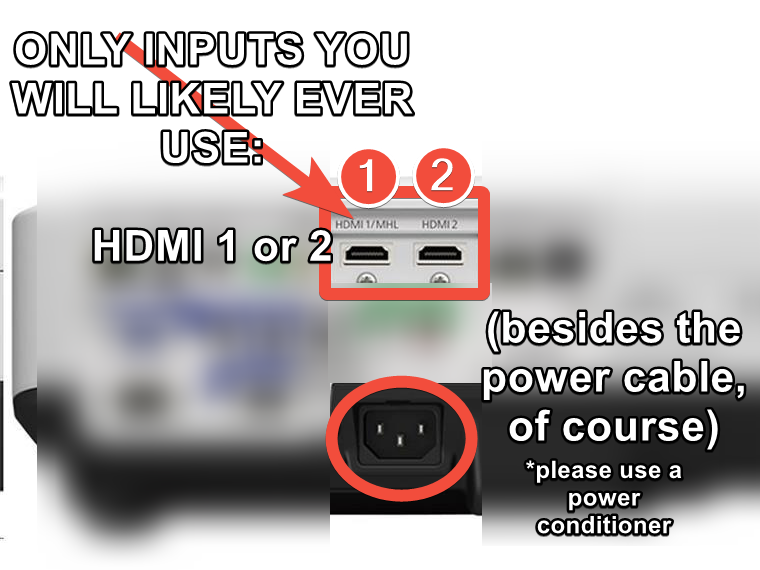
Keep in mind, HDMI cables carry both video and audio. If all a client is using a projector for are in-person presentations, presenters don't often have audio they're concerned about playing to the rest of the group. However, if they're having a hybrid meeting, or someone making a presentation across Zoom, etc. these circumstances might require a better sound system setup, in which case, there's one more connector to concern yourself with:
Connecting the Projector to a Sound System
If you need to connect the sound from the projector into a sound system, there's only one way to get the sound from the projector: A 1/8" stereo output connector, aka "headphone cable".
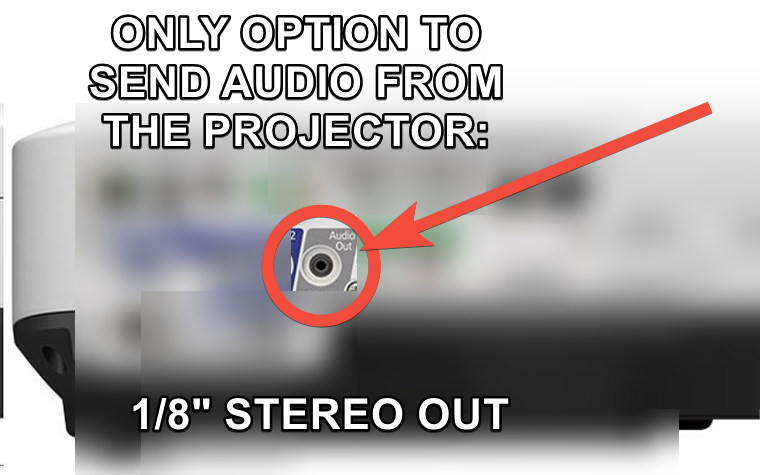
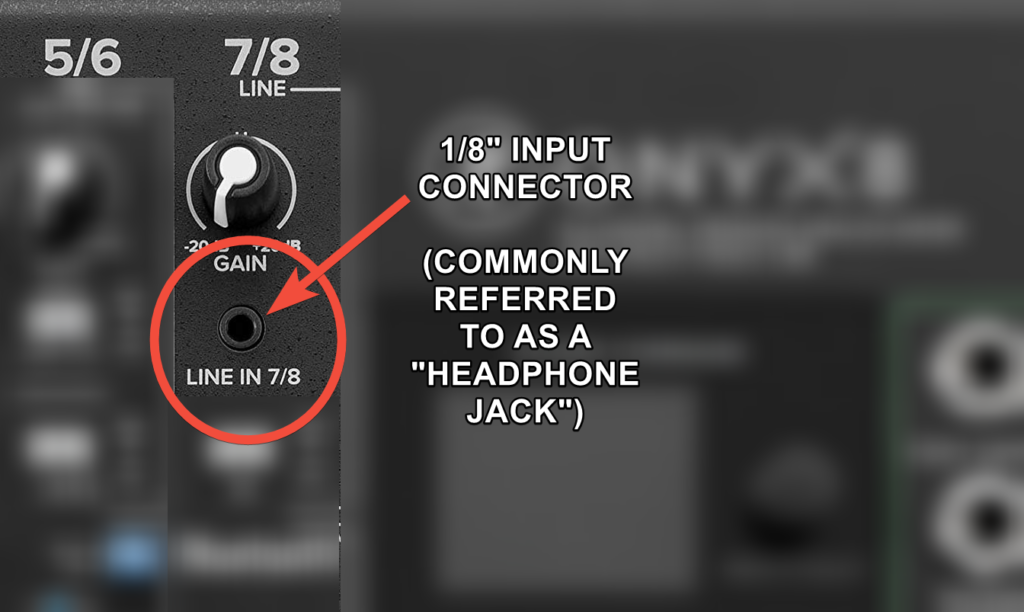
1/8" to RCA and 1/4" cables are common, and we have some in the banquet office, so getting the signal to the mixer or Plymouth room should be relatively straightforward (there's even a 1/8" connector on the front of the mixer - use 1/8" to 1/8").
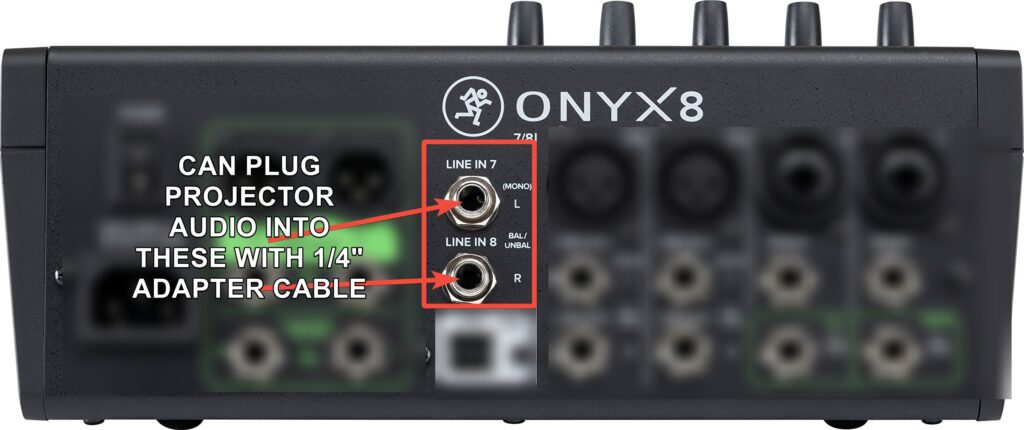
On the back of our mixer, there are two 1/4" inputs for 7 & 8 which can be used for the right and left outputs of a stereo 1/8" converter cable:
Or, if you have a long 1/8" cable, you can plug straight into the front of the mixer:
Connecting Projector Audio to Plymouth Room Sound System
Connecting the projector to the audio in the Plymouth Room would require a DI box and using two of the XLR microphone inputs along the walls:
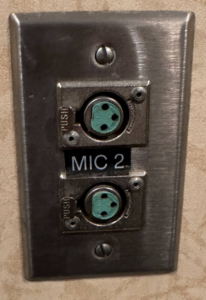
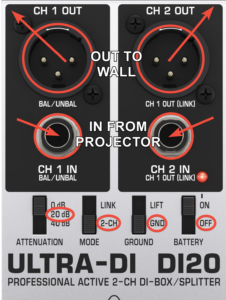
To learn more about how to use the sound in Plymouth room, please read our section on how it works
Using the Client's Computer Audio Output Instead of the Projector Audio Output
If the client's computer is closer to where you need to connect audio than the projector, you can switch the client's software to use their computer output for audio instead of HDMI. Here's an example of what that might look like:
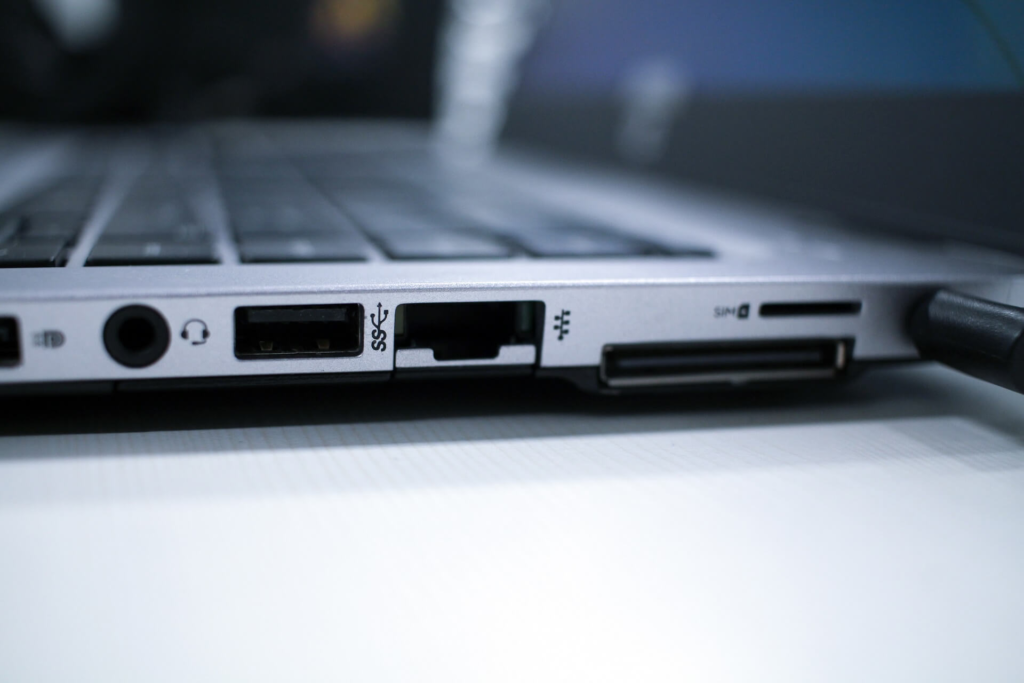
In this case, you'd connect your 1/8" connector to their computer and run the cables to your sound system from there.
A computer using HDMI for an external video output will often send audio through the HDMI cable by default. Therefore, you'd probably have to adjust the computer's settings in order to have the audio sent through the computer's output instead of using the HDMI cable.
As far as switching the software settings, it's not that bad if you have some idea of where to start. Here's two examples - one for MS Teams and one for Zoom. If you need to to do this, or are just curious how it is done, I suggest reading the articles I've included below.
Changing Audio Output Settings in Teams
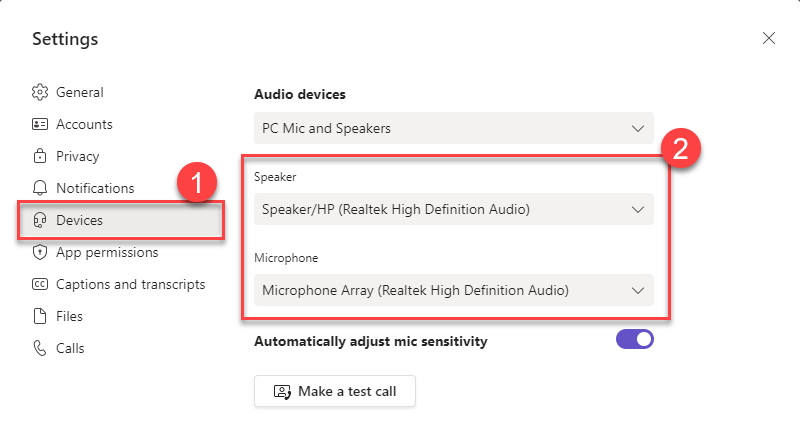
Further reading: How to change audio device settings in Microsoft Teams
Changing Audio Output Settings in Zoom
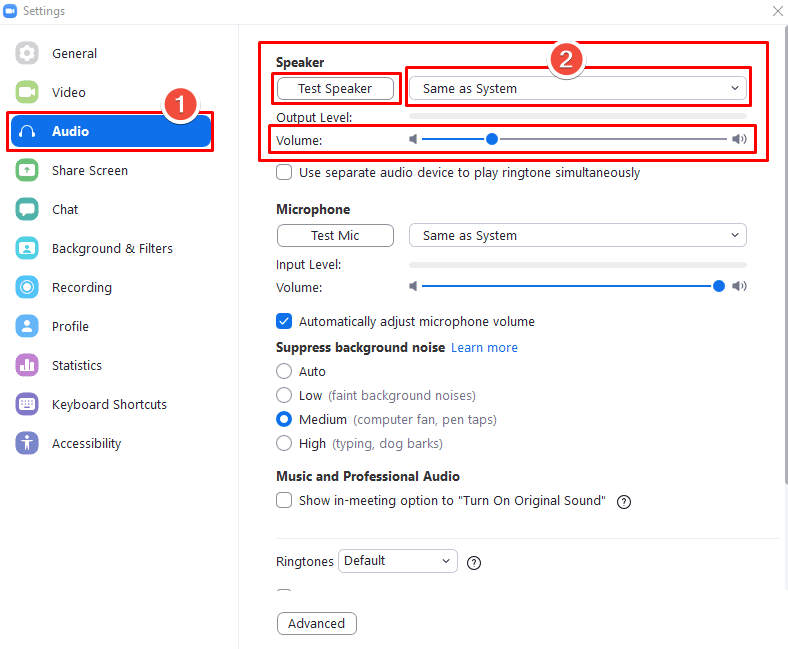
Further reading: How to change audio device settings in Zoom
Additionally, the setup may require you having some understanding about how system devices are configured on different computer platforms, so here's some comprehensive instructions about system audio settings in Windows 11, and also comprehensive instructions about system audio settings in MacOS
Good luck!
References:


No comments yet